 September 27th I had the opportunity to exhibit my work in the 4th Annual Maplewood Art & Music Walk. It's the first time in several years that I set up a booth at an outdoor art fair. And, while I was a little rusty, I was thrilled with the results of my setup, the numbers of people who stopped by, and my sales. There are certainly some things that I might change, but I thought I'd take a minute to share my successes, which I've learned over many years of doing shows, as well as the failures. I'm still learning from my mistakes and will be brutally honest about what hasn't worked. Before doing so, I have to thank my helpers: my husband, Lee, who gave up part of his Saturday to run errands for me and test-run my tent, and most of his Sunday to help me set up my exhibit and tear it down. My littlest helpers were my two sons, who despite sometimes being difficult to have on hand, were actually quite helpful. Joel, my 6-year old, helped put up the tent, velcro the walls, and hang signage. My 2.5 year old, mostly stayed put in his stroller (very helpful), then played with bungee cords with his brother (helpful while they were having fun, until the big bro knocked over the little bro on the sidewalk). I have to say it wasn't the most relaxing setup I've done, but they all really played a huge part in what you see above. Looking back, I wish I had the clarity to take some shots of them helping. THE MUST HAVES: Quality tent. My tent, made by E-Z Up, is over ten years old. It's their standard model with white vinyl sides. While it's been great, even outlasted a small tornado in Sparta years ago, some of the trusses couldn't handle the age of the tent and snapped at the end of its last use. FYI - E-Z Up sells replacement parts! So, for $48 (included shipping), I was able to replace two of the trusses which extended the life of my tent. I was able to place the order a few weeks prior to the show and repair it in advance. Hopefully I'll be doing more shows in the future, which made this a great investment. 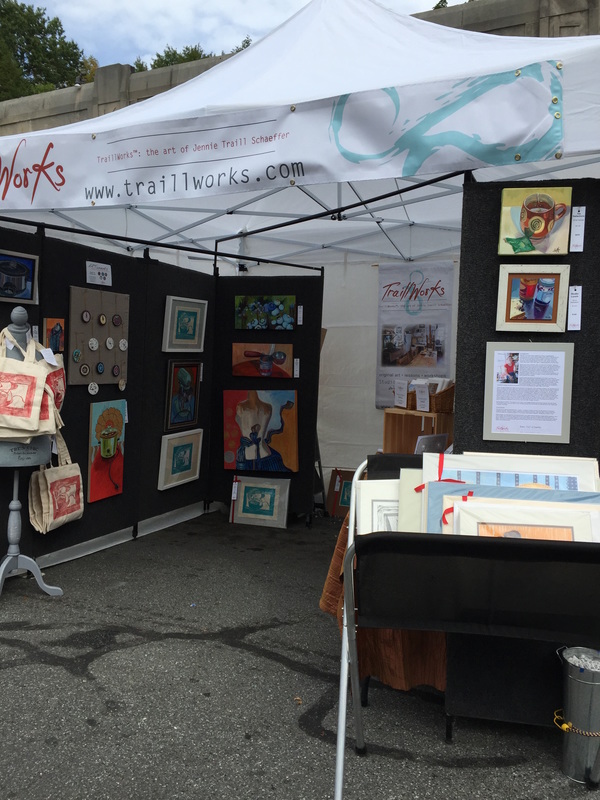 Secure your tent. We've used tethers and tie-downs in the past (found that out during the tornado at Lake Mohawk in Sparta when I did the German Christmas Market). A few shows later, I developed decorative weights with the help of my husband's construction prowess. He poured concrete into large metal vases that were equipped with PVC pipe in the middle so that I could add a floral / greenery element. These were secured to the tent with bungees. Sadly, I made the mistake when I closed my gallery in 2013, of discarding them. This was a mistake! I invested in new galvanized metal vases, but lack of time forced us to fill them with marble chips., a good temporary but messy solution. My kids kept tipping them over! Fortunately the day was not overly windy and they did the trick. For future shows, I will likely fill them with concrete as we did in the past. I would change the bungee cord as well. 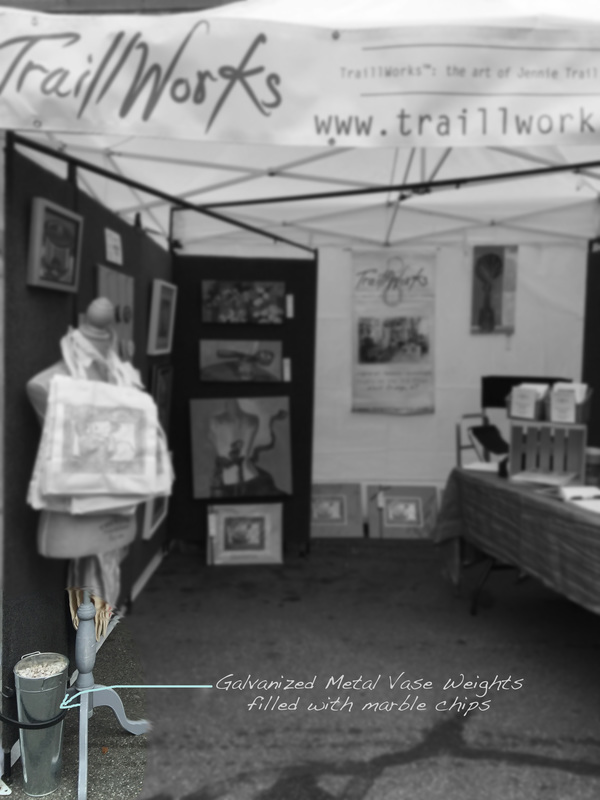 Great signage. After years of hanging ineffective signage, I did some research and determined how to create what you see above. I have some InDesign knowledge and do all of my own promotional material work. Saves a lot of money. In the past I had a standard 2' x 3' banner that did not fit into my display structure. This time, I went back to former shots from previous shows to determine the set up and then looked at where I had empty space. Bingo, I realized I needed banner that would hang on the frieze of the tent and a vertical banner to hang in the back of the booth where I have white space. But, how do you hang a frieze banner when there is nothing to hook it to? I discovered the amazing upholstery twist pin which enabled me to tack up my horizontal banner to the tent canopy! It was super easy and secure. And I also designed the vertical banner to brand the booth once you were inside. I want to support local businesses, but found for this purchase, I needed something I could order quickly online with my uploaded design. In just under $100 I purchased both banners from Banners.com, one with grommets and hemmed sides and one with a pole pocket, which I easily slid a zip-tied wooden dowel through to hang. 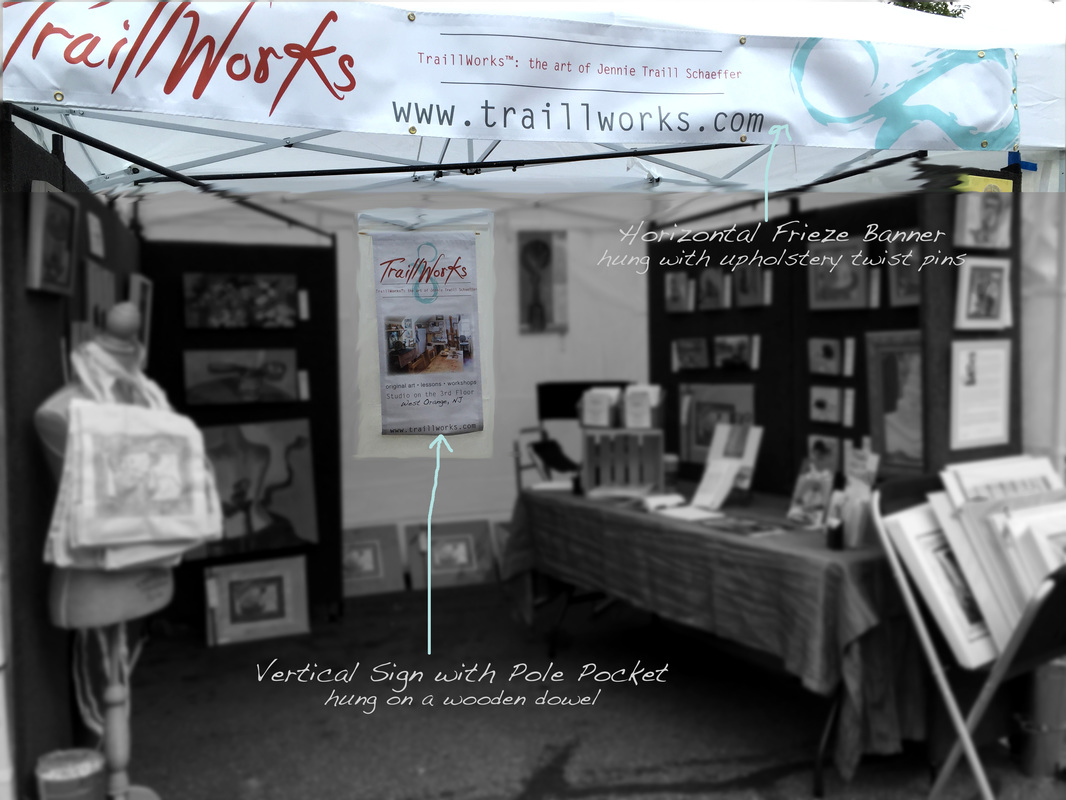 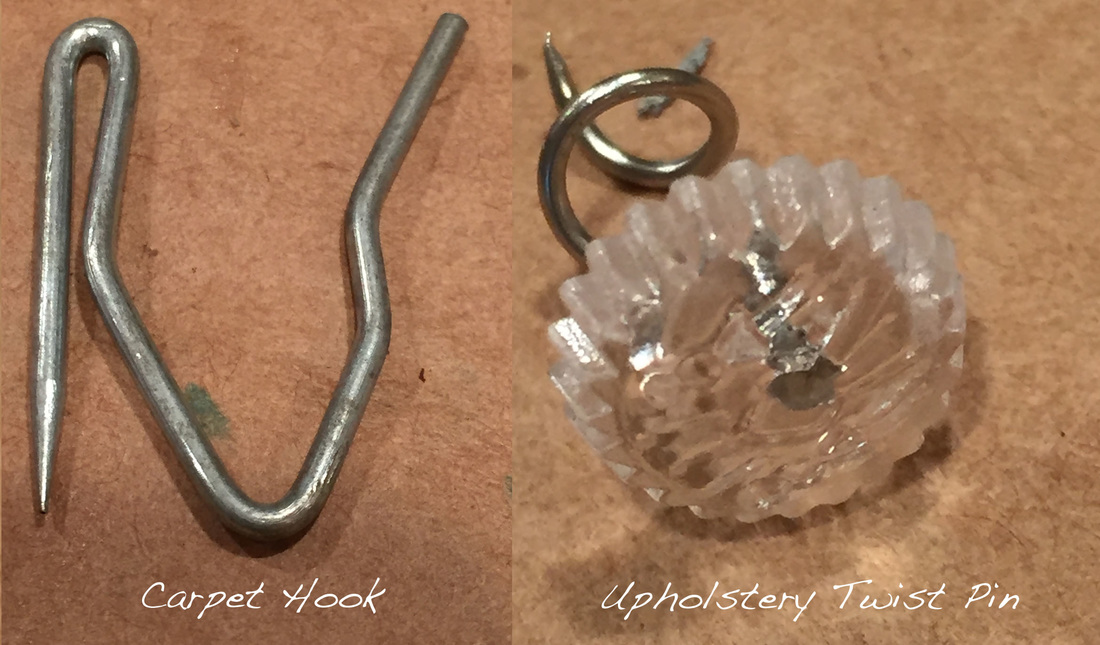 Display walls. Over ten years ago, a local artist was selling her used Pro Panels and I was able to purchase them used at a very affordable price. In addition to the panels, she passed along all of her carpet hooks and all of the support bars and stiffeners. I have gotten more than my money's worth. The panels are lightweight, constructed of foam and carpet, fit in my Honda Pilot, and can be arranged in a variety of groupings. I have 5, 38.5" panels, and 2, 18" panels. I have found I really like the openness of the arrangement I used in this show, along with the use of a long banquet table for sales and display of smaller items. Range of prices. My work is often tough to sell at outdoor art fairs because it does require so much time, which is reflected in the price. However I always have offered a range of price points and scales of work. Reproductions are great to offer if that is within your philosophy. What I found this show is that many people weren't ready to decide to purchase them because they were uncertain with size. I had limitations only having my iPhone so it made it challenging to sell my other works from Fine Art America; something I will have to consider next show. Though the larger work has not sold, I like to bring some to show what I am capable of. Typically I offer a range of greeting cards as well (though I didn't have as many handy at this show). I also offered my calendar for sale, but it was still in print so I only had a maquette. Sadly those did not sell. Labels. Put labels and pricing on your work! People don't want to guess. Don't make customers jump through hoops. My customers have always appreciated seeing the price of an artwork. 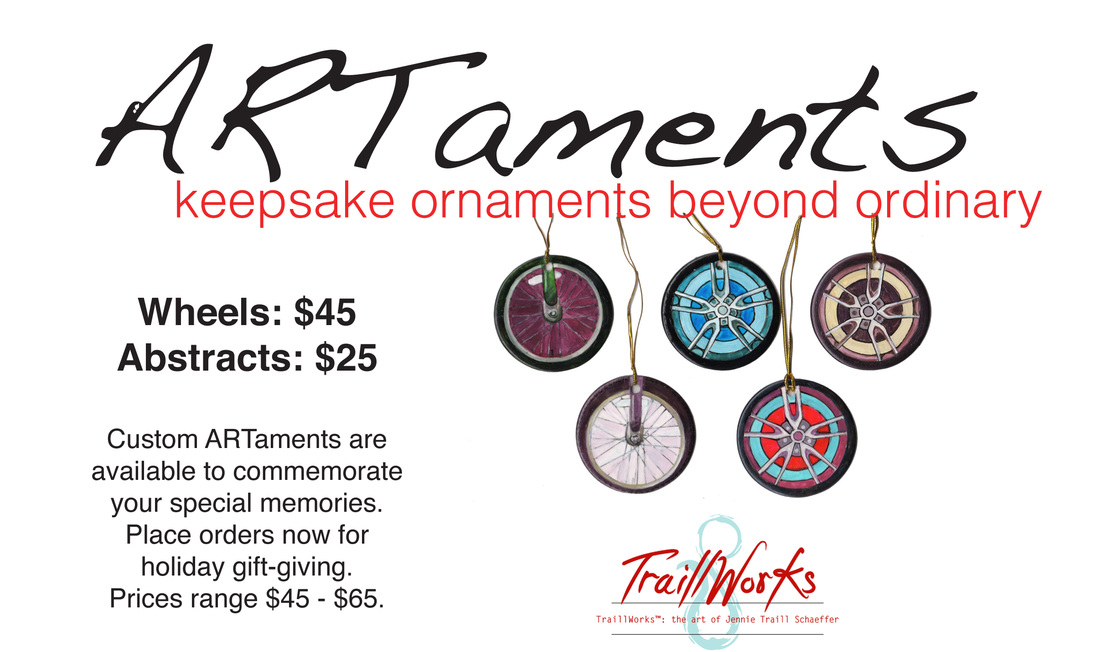 Example of a point of purchase sign in my booth. Point of Purchase. This goes along with pricing in some cases, but it could be a sign to promote a particular product or artwork. Maybe a tag line is included or special offer. Or maybe features of an item. I also paint Wedding Cake Portraits and while I did have some examples on display, I had a book on hand that featured cakes I've painted. When the conversation came up, I was able to leaf through the book and talk about the stories behind the paintings. Business Cards / Promo Items. Have professional business cards readily available. I even give them out to kids. Who knows what they will do with them, but if they are engaged and interested, maybe they'll continue talking about my work to their parents. A neighboring exhibitor had magnets of their work as giveaways; thought this was a great idea! Moo makes a great product, with lots of options. My prospective customers are always remarking on the quality of the cards I hand out. Newsletter Signup. Do you offer your fans a newsletter to subscribe to? Sign up new followers at your booth. I keep a book that I later enter my clients in manually. Though I will be revisiting this process because my conversion rate is not great and my email marketing service, AWeber, now offers an app to collect subscribers on site. The only trouble is my iPad is not set up for cellular, so I have not been able to take advantage of this feature. This is an area I need to learn more about and develop further. In the meantime, subscribe and learn more about TraillWorks. Packaging Materials. You must have a way of packaging and finishing off your purchases. Remember, that if your collectors are walking around with your purchased art, rather than showing off bubble wrap make certain you have a logo / label somewhere along with some kind of packaging that draws attention. You're customers are walking advertisements. I've always purchased my kraft paper bags and colored tissue from Nashville Wraps. Oh and don't forget the Art. Make certain you have quality art that is ready for hanging, in a ranges of prices and sizes. You can see the variety of sizes and products in my booth shots. I'm mainly an oil painter, but I also create linocuts, hand-painted ornaments, and hand-painted tiles. I also create an annual calendar of my work and take commissions. What didn't work. I would have liked to have sold more of the smaller pieces. My ARTaments, custom hand-painted ornaments, also did not sell. And, I was hoping to sell all of my handprinted Reusable Art Bags, featuring St. Mixer, but I only sold one. Since I was by myself all day, I couldn't get out to explore the show. I do know a neighboring photographer was selling tons of works at $10 /piece. I can't and won't compete with that. I've never done amazing at outdoor shows, but do feel they are worth the promotional time to get in front of people. Maybe I need to reconsider? But, I did sell a small, but significant, work to a new client who has followed up with me to purchase another piece she saw that day. I never would have connected with her had I not done this show. This is the hardest question of all to answer, why didn't work sell? Was it the subject matter, was it the price, was it the limitations of what I had, is this not the right venue for me, etc? I will continue trying to answer that question, but in the meantime, I will tweak what I sell, what I make, and where I sell it, without sacrificing my goals of creating engaging, interesting works that speak both to me and my audience, wherever they may be! Good luck to you and check back soon or subscribe for my next post featuring a recent jaunt through the Visual Arts Center of New Jersey's exhibitions.
2 Comments
10/27/2015 11:27:04 pm
Thanks for all the tips Jennie! I really appreciate you taking the time to share your experiences with other artists :-)
Jennie
10/28/2015 06:32:46 am
You're so welcome Peter. Glad you found it useful! How'd you stumble upon my post? Leave a Reply. |
Jennie Traill SchaefferDeemed the Kitchen God's Artist by NJ Savvy Living for my sainted appliances, I'm now known more for my vibrant, meditational paintings of chairs set surprisingly in landscapes. Since relocating to NC from NJ, mothering my two sons, and caring for our rescue pup, Cider, took the lead. Now, that my Durham home studio is renovated it's open again for virtual art coaching and the resumption of my personal art and commissions. The work I make is inspired by my joy of teaching, exploring nature, and traveling. On The Teaching Artist Blog, I share my approach to teaching and educate my readers about my creative process. Join my VIPs for First DibsWORKSHOPS
Archives
January 2024

Want to read more from the past? Click here to read archived blog posts from my previous blog on Blogger.
Categories
All

|
 RSS Feed